
Building a Colonial Marine Helmet

Tools used in this tutorial
The steel helmet is made from hardened Hadfield Steel and as such requires some real power tools to cut through it.
You’ll need a decent angle grinder with thin cutting discs,
Drill with Tungsten Carbide drill bits (4mm),
Dremel,
Sand Paper.
Constructing the helmet will vary depending on whether you are making a steel helmet or a plastic one.
Most of the features are already pre-moulded into the Plastic helmet, so I’ll cover the Steel helmet here and just mention the bits that relate to the Plastic lid.
Step 1
Firstly trim all of the plastic parts so they fit snugly onto the outside of the Helmet.
When that is done, mark the outlines of the parts onto the helmet itself for reference.
Drill the Right Hand rivet hole… You’ll need this for the next step!
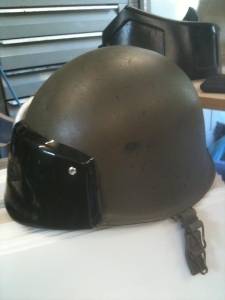
If installing an IR Sight into a steel helmet, you may need to cut out a large slot for the IR Sight housing to sit in. This is hidden away under the Strike Plate.
For installation of the IR sight, please see the IR Sight Build Tutorial.
Place your IR sight inside the helmet, and Mark the inner edge right up against that rivet hole, leaving just enough meat for the rivet to grab.
This is what happened on the Screen used Helmets for their IR Sights.

Step 2
Affix the strike plate with 2x 4mm rivets, one in each upper corner.
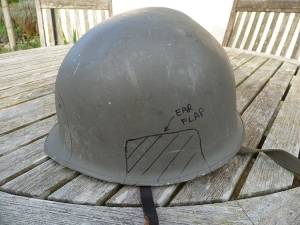
Do the same for the Ear Bump. Remember, you’ll probably need to cut a gap for the flap and ear defender. The positioning of these will vary depending on your head, so work out a comfortable position for the ear defender (on your ear) in relation to the helmet and make the cut out to suit.
Using a heat gun, gently warm the inner lip of the strike plate and bend it down under the rim of the steel helmet, securing it in place.
Step 3
Retain the chin strap from the part you just cut out. This can be re-used.
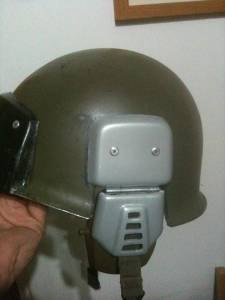
Step 4
Affix with 2 rivets to the helmet. The Hinge is glued to the inside of the bump with epoxy or hot glue, and the same on the inside of the ear drop plate.
Feed the chin-strap down behind the plate.
The ear defender is then glued to the drop plate. You can add in rivets for extra screen accuracy.
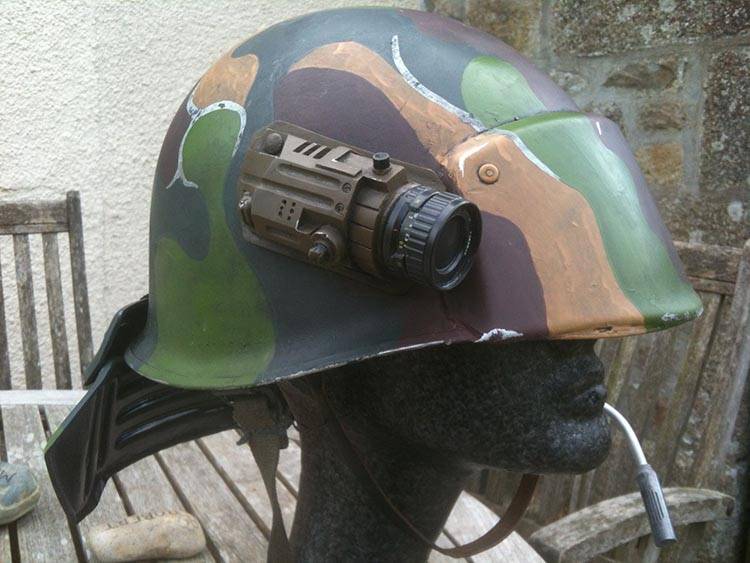
Step 5
The camera is affixed to the side of the helmet. This can either be glued, or drilled into place.
We drill through in roughly the centre of the camera body, and then secure from the inside with a large self tapping screw.

Step 6
Cut the two slots on the back of the helmet for the Lobster Plate straps.

Step 7
Affix the lobster plates with webbing in the configuration as shown below.
If you want the Lobster plates to be removable, rather than riveting the straps in, use velcro on the inside of the helmet.

Step 8
Drill the holes for the Mic tube in the ear defender. Make sure it lines up with your mouth.
Insert the tube and bend to suit the profile of your head.
Put on the mic tips and glue into place.

Step 9
Paint and then weather to your preference.


