
Building your Scout Armour
Tools used in this tutorial
Dremel Rotary Tool
Lexan Scissors (or aviation snips)
Sandpaper
Stanley Knife
Drill and 4mm Drill Bit
Needle Files
Heat Gun or Hair Dryer
Hot Glue Gun
ABS Glue
Here’s a quick tutorial for those people wishing to build their biker scout armour… (We will be updating this as we get more pictures… so it’s no quite complete, bear with us).
Step 1
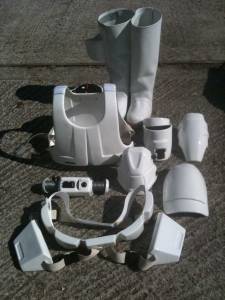
Depending on which kit you get, you’ll end up with a box of stuff like this…
If your kit is rough trimmed then your first job is to trim down all the armour to the correct shapes.
This is probably the most important stage of the entire build, so take your time and follow any trim lines that are on the pulls.
You’ll need a pair of decent lexan scissors, or aviation snips, some sandpaper and a Stanley knife.
Step 2
Take the majority of the meat out with the lexan scissors and when you’re happy with the profile, just run the edges with the sandpaper to blunt any sharp edges.
Trust me on this… slashed fingers abound… it’s not pleasant.
Step 3
Then you’ll come to putting it all together.
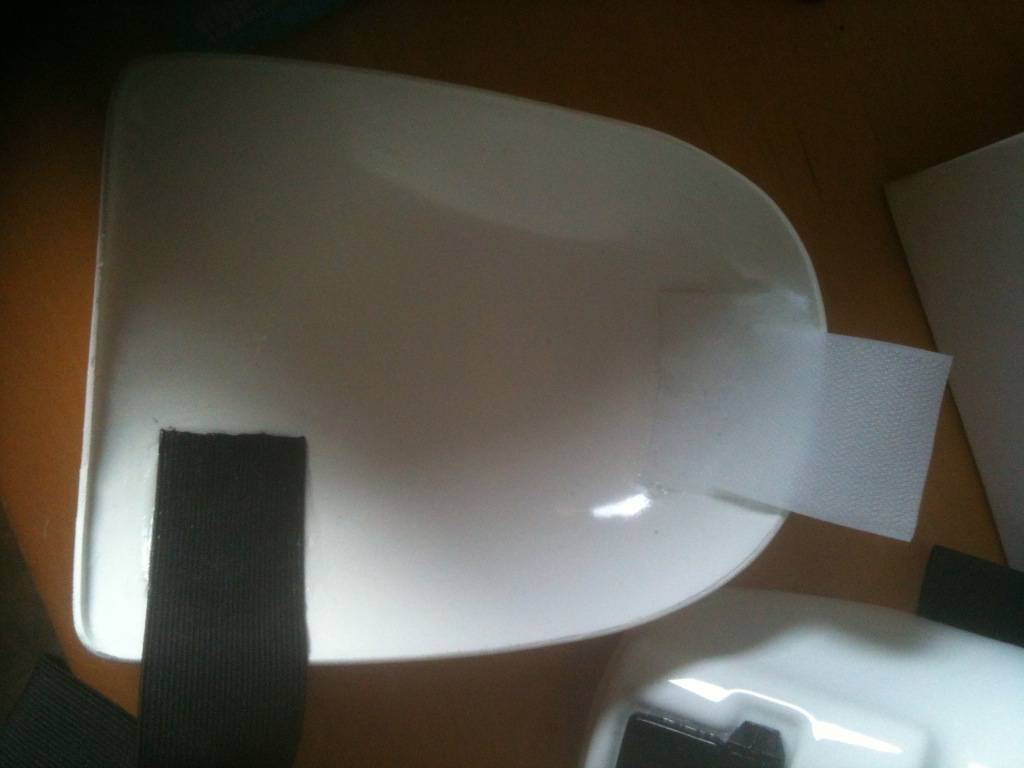
The Biceps, Forearms etc… are all secured using an elastic strap that wraps around the limb.
There are many methods as to how you do this, but they are all on the same principle.
The elastic goes around the limb, through the slot in the armour section and then is secured on the armour itself.
You will need to slot the armour sections for the strap to go through.
We use a dremel with a router head for this because it’s quick and easy, but you can just as easily drill a hole at either edge and use a Stanley Knife to cut between the two holes.
The detail here is shown on a buck, but you get the idea.
The parts that need the strap slots cutting are as follows.
Biceps, Forearms, Chest, Back, Belt, Drop Boxes and Knees.

Step 4
Once the strap slots are cut, it is just a question of feeding the elastic through the slots.
How you do the securing is entirely up to you. It can be simply glued using something like E6000, but we simply use a dab of hot glue.
Make sure you give the plastic a little rub with sand paper to give it a good key for the glue to bond to.
You can use Velcro on the ends of the elastic, if you need the strap to be removable.
Or for extra security, you can add in a popper to the centre of the velcro.
All the main strapping is done in this way.
The strapping sizes vary from part to part.
Here’s a break down.
Biceps – 40mm elastic
Forearms – 25mm elastic
Chest/Back sides – 40mm Cotton Webbing
Belt/Drop Boxes – 40mm Cotton Webbing
Knees – 20mm elastic + 12mm elastic upper strap.

Step 5
The shoulder bells are a little different.
The strap doesn’t go out through a slot it’s attached directly to the inner part of the bell, and this can be a point of weakness in the strapping system. Make sure you use plenty of glue here, or even put a bit of bracing over the elastic to hold it in place.
The top of the bell can either be secured using a velcro patch/popper combination, or for screen accuracy by adding in a plastic zip tie that goes up to the shoulder bridge.
(please note, the shoulder bell is secured by a 12mm bit of elastic, and not the wider 38mm as show in the picture… That’s old news!)

Step 6
The T-Bits on the biceps need to have their detailing sections both pointing forwards when worn…
When laid side by side, the details should appear to be opposite. Red dots to highlight what I mean…

Step 7
The next bit of armour is the knees.
These are strapped using two different sized straps and two different methods.
The 20mm one is the same as above…
The 12mm one is attached via the rivet details. Rivets on the knees are left unpainted.
The rivet is placed at the upper edge of the triangle section… Refer to the picture —->
The upper strap is held in via the rivet and a washer, or as we have used here, a small scrap of spare plastic.


Step 8
The Back Hump is next….
Trim it up so it fits snugly with the back-plate. It doesn’t have to be flush (the screen used ones were awful…), but try and get it even as best you can.
Work out where the top of the tank is going to sit and mark it on your backplate.
Then add in a right angle section of plastic.
You can make this bracket using a bit of the spare plastic in the kit. Heat it up with a heat gun or hair dryer and bend it over the corner of a block of wood or a vice (be careful it will be HOT).
This is going to be the bracket that your tank sits on. You can either glue this or rivet it.

Step 9
Glue the tank to the bracket.
The bottom of the tank is secured by a rivet that goes through the tank and the back-plate.
Don’t forget the backing washer. This is a high stress part and needs to have the backing washer to prevent the plastic cracking.
This rivet is left SILVER.

Step 10
With the tank secured, you can glue on the topper detail and add the pin striping.
For screen accuracy, only use either 1, 4 or 6 stripes on the tank side (right hand side as you look at it).
The tank topper has the rivet detail painted silver, the circle indent painted white and the top stripe painted red.


Step 11
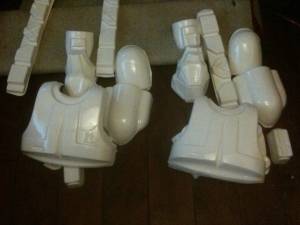
Joining the chest and back together…
The sides are joined in the same fashion as the other armour sections using the 40mm WHITE Cotton Webbing.
Make a long strap with two sections of 40mm cotton webbing that are long enough to go between the chest and the back plates when they are worn. Make sure there is enough to add in a patch of velcro on the ends.
In between these two bits, sew in a small length of the 40mm elastic. You should now have a strap that is long enough to go from one side of the chest plate, into the back plate, around your back and back out of the back plate to the chest again.
The bridges are secured using a length of 25mm webbing, glued on the back-plate and then velcroed to the front. If you can get your head through the hole, then you can glue them to the front too, no need for the velcro.

Step 12
The bridge covers are then wraps of fabric that cover the join between the two plates.
Don’t forget to paint the chest indent GREY.


Step 13
Then the belt…
The main webbing strap is velcro’ed on either end like a TK belt.
The plastic section is affixed to the webbing belt with both glue and rivets. I tend to glue all the sections where it touches (ie the flats and not the boxes), and then there is a rivet in the end sections of the belt. These rivets are left SILVER.
Note the big plastic washer to spread the load on the rivet.
The white cotton drop straps go through the front box of the belt and then have a buckle attached.
For Screen accuracy (and ease) it is best to use one long length of cotton webbing and simply feed it through the buckles and the drop boxes and then attach the loose ends to the rear.
We’ll change the pictures over when we get chance!
The rears can be glued or stitched. They should be affixed to the belt so they line up behind the thermal detonator.
The top of the Drop Boxes should be about 2″ below the bottom of the belt line.


Step 14
The Thermal Detonator is made up of the main body, tube, end caps, clips and greeblies.
The tube is secured to the main body via a Cable Tie that goes through the body and around the tube. This forms the central vertical detail stripe on the main body.
The clips for the Thermal Detonator need to be bent into shape, so they can hook over the belt.
They are simply riveted into the tube (don’t forget a backing washer on the inside).
The end caps are glued to the end of the tube.
The greeblies are placed with the circular one on the right as you look at it, and the rectangular one on the left. The ‘Tabs’ on the rectangular greeblie should be uppermost.

Step 15
Then there is the boot holster.
The outer section is glued to the main holster.
Make an L shaped bit of plastic to glue the front section of the outer to the main holster.
The rear section just glues in place.
The holster is then attached to the boots with a rivet in each corner. These are left SILVER.
It is best to have a large plastic backer on the inside of the boot (so it effectively sandwiches the boot vinyl between the holster and the backer, as well as a metal backing washer. This stops the rivets pulling through the boot vinyl.
Please note there are NO black detailing stripes on the holster.


Step 16
Get out there and look AWESOME!


